Tips
Mastering Your Own Mixes
WHERE MUSIC COMES TO LIFE
Listen To Our Recent Work
Hopefully these tips have given you a better understanding of how to apply compression during mastering. For more mastering tips, check out this article
9 Tips for Mastering Your Own Mixes

Dec 25, 2020
One of the first rules of music production has been to never to master your own mixes. But some rules are meant to be broken: Learn how to polish off your finished mixes without losing your perspective.
by Jay Fly Mastering


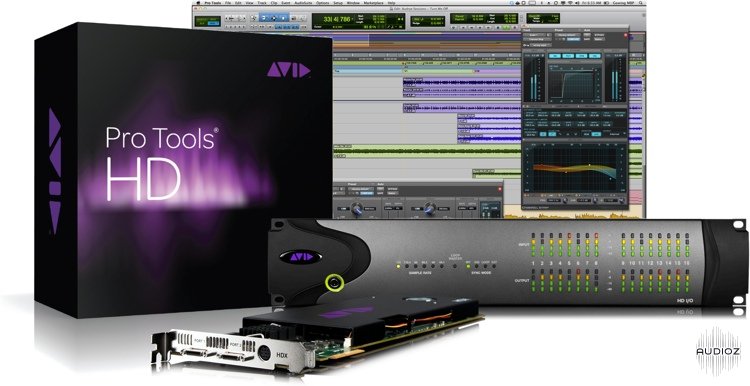
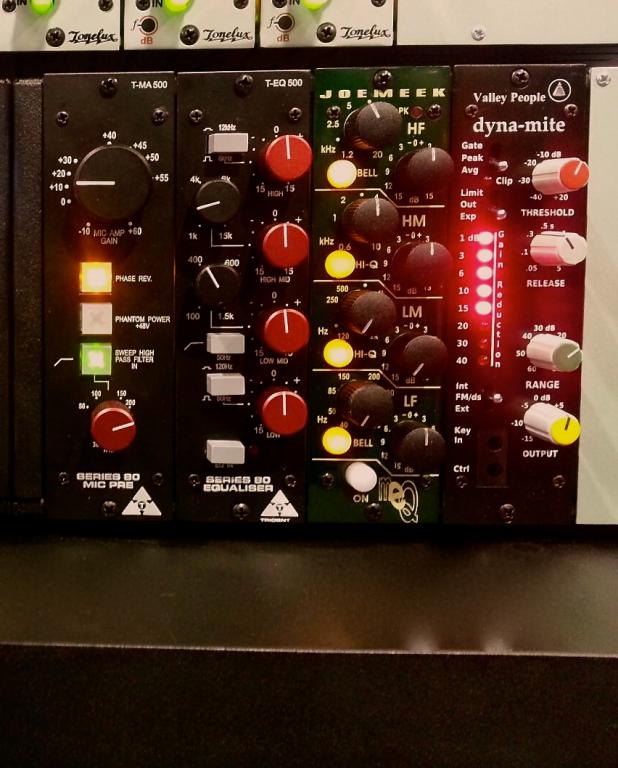
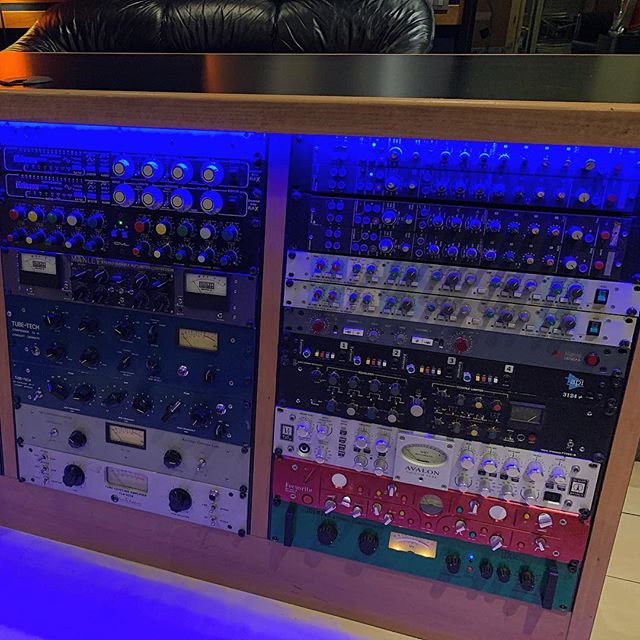
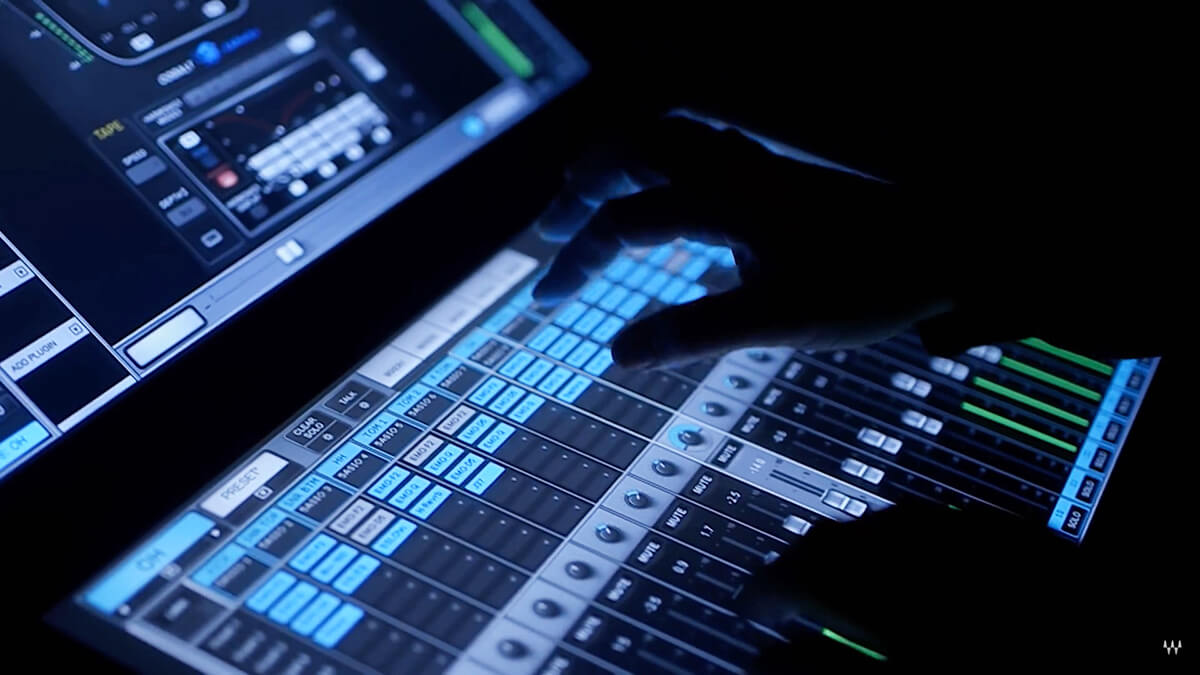
The common wisdom of the pro audio world has always been that you should never master your own mixes. The reasons are plentiful, but the most important one was that mastering was a completely different profession from that of the mix engineer. In other words, give your finished mix to a professional who has made their career practicing the art of mastering, and you will reap the rewards of their experience. This was, of course, the era of big recording budgets. A lot has changed...
Fast forward to the way records are often made these days, and you will find that many mixing and mastering engineers have built their own personal mix and master studios away from expensive commercial spaces. In order to keep the work coming in steadily, many have crossed over their skills to learn the art of a once separate profession.
Today, producers and artists alike are learning the skills of mixing and mastering to present their music in a competitive way alongside commercial recordings. Meeting the need to keep expenses low and still produce a quality product can be a practical reality. But even if you are a skilled mixing and mastering engineer, mastering your own mixes presents unique challenges. Some obvious, some not so obvious:
1. Maintain a mastering perspective
One of the primary reasons mastering your own music is such a challenge is perspective. Nobody knows your mix better than you do. The mastering engineer's job is not to evaluate the countless creative decisions made in a mix. Their job is to help the existing mix to translate to the consumer environment. They don't care if there is enough reverb on the vocal, or if the snare cuts through the mix, unless those mix imbalances are inhibiting the ability of the mix to translate to consumer environments.
Compartmentalizing yourself to the mastering mindset is critical to making the best processing decisions. So how does the mastering engineer listen to a song? What are they listening for that the mix engineer might not be focused on?
The following are some specifics for helping to change the way you listen; and to put your mastering engineer's cap on while leaving the mixer's cap in the lounge:
2. Listen to commercial music
Hone your genuine appreciation of well-produced music that sounds great. Listen for the aesthetic qualities of imaging, depth and sound field characteristics. Mastering engineers want the music to 'escape' the speakers so that they and other listeners can be raveled into an experience.
When listening to commercial productions, focus on the clarity of imaging, the depth of the sound field and the overall listenability of the music. This will help shift the focus of your attention to the way your mix will translate to the consumer experience. Most common consumers don't really care about the specifics of the mix, they just want to take in the music as an enjoyable experience. The "head bob test" is a great one: listen to commercial releases and see what your head does. Now listen to your music without thinking about it too much. Is your head bobbing to the beat?
Many productions are crafted after, or inspired by, quality productions of a similar artist. If you have modeled the production of your song and mix after a particular artist, album or producer, then import those commercial releases into your mastering session and use them as a basis for comparison. It is vitally important that you do not try to match the same frequency response, but rather, try to match the imaging quality and listenability.
3. Take a break
The absolute worst time to master a mix is directly after you have finished mixing. It's best to wait at least a day, if not longer, before approaching the mastering stage. If you are pressed for time, changing your perspective by doing something completely different to occupy your mind will be beneficial.
Remember, the objective of a quality master is to help the mix translate to the consumer environment. If you find that mix imbalances are inhibiting your ability to do so, then close the mastering session, open the mix session and make the necessary adjustments. You did create a separate mastering session, right?
4. Same song, two sessions
Never master your song in the mix session! Read this 10 times over, or as many times as it takes to get you into the habit of exporting your final mix into a brand new session.
Remember, the mix engineer is now chillin' in the lounge, and the mastering engineer cannot be concerned with the complexities of a myriad of tracks, complex routing and effects. Export the mix at the same sample frequency and bit depth as the mixing session, and create a new session for mastering with the same, full-res settings. One stereo track is all you need to get started.
The benefits of creating a new mastering session goes hand in hand with the necessary change in mindset. If you attempt to master in the mix session, you will quickly find yourself making adjustments in the mix instead of focusing on the processing necessary to make the mix translate to the consumer world. Although it may seem like an unneeded extra step at first, you will soon find that the end results justify the change in session
Before you go ahead and export the final mix for mastering, though, here are some mix decisions to consider:
5. No maximus on your miximus
One of the most requested suggestions of the mastering engineer to their mixer clients is to leave any maximizers or brick wall limiters off the final mix export. Limiting, or loudness maximizing on the mix buss limits the ability of the mastering engineer to apply processing effectively, especially if applied excessively.
Limiters should always be applied as the final processor stage in the mastering chain. This exactly why they almost always have dithering algorithms built in. If you like the sound of your maximized mix, export one with and one without, so you can use them as a basis of comparison. You can also use the same limiter settings at the end of your mastering chain if effective.
6. Should I compress the mix?
The best advice for whether to leave your mix buss compressor in or out of the mix export, is to decide how confident you feel about it. If you love what it does, or if you started the mix with the compressor on the master fader, leave it in. If you are unsure in any way, leave it out. There is no right or wrong in this regard other than what achieves the best results. Tape emulation plugins fit into the same category, since compression is a big part of the tape's sound and is a big reason why you'd use them.
7. How about EQ?
Equalization is definitively a mastering process more than a mixing process. Any mix that is built into an existing EQ or compressor should be kept in the final export. If you are throwing a bit of EQ on at the very end of your mix that you like, store a preset and import the settings into your mastering session. The mix engineer in you may love it, but the mastering engineer in you may have second thoughts.
8. Avoid duplicate processing
Many of the plugins we use in our mixes are also very valuable in the mastering process. Plugins like the Kramer Master Tape, PuigTec EQ, and the PuigChild Compressor are equally suitable in both worlds. Some, like maximizers or limiters and linear phase compressors or equalizers, are generally more suited for mastering work. It's important to take stock of plugins that are specific to mastering in your collection. If you are not sure if a plugin is good for mastering, go to the plugin manufacturer's website and see if it's included in any mastering collections. You may find some hidden gems that were included in a bundle you purchased but never found their way into one of your mix or master sessions.
For example, using an SSL Buss Compressor on your mix buss with a slow attack and fast release is a great way to get your mix to pump and breathe. Using it again in the mastering will just exaggerate the effect and often ruin it. Instead, maybe try a PuigChild with a time constant of 4, 5 or 6 (a common broadcast setting) as a counterbalance to the SSL. This can help to frame the pumping and breathing movement of the SSL Buss Compressor and make it more effective.
Remember that in the end, mastering is all about balance, and helping the mix translate to the consumer environment. This requires a different approach to processing than you may use in a mix. It's not uncommon to slam a mix buss compressor in a mix but it's almost unheard of in a mastering session. The mastering chain often requires precision processors that take a heavier hit on the CPU than their mix buss counterparts.
Polish, don't punish the mix. The credo of the mastering engineer is "do no harm." In that respect, radical forms of processing are not the regular fare of the mastering process. If you find yourself boosting 6 dB at 50 Hz in a mastering session, it's more likely that your mix needs the adjustments, not the mastering. Remember, a little bit of processing goes a very long way in mastering.
To see an example of a simple mastering session and the processes involved, watch as Graham from the Recording Revolution shows you how he prepares his mixes for online streaming:
9. Listen to every adjustment
Every adjustment you make in a mastering session affects the perception of every instrument in the mix. Don't believe me? Load up a mix and add an EQ with a 1 dB boost at 10 kHz using a high frequency shelf. A/B the EQ in and out but only focus your attention to low end instruments like the kick and bass. Notice how the clarity and depth is affecting your perception of those instruments. Crazy, but true! Remember, as you apply any form of processing to the master, take inventory of how it affects every instrument in the mix. This is the mindset of a mastering engineer, and is the reason that the mix engineer is waiting in the lounge.
Mastering your own mix and music is a unique challenge. It requires an ability to change personalities and take on the mindset, reasoning and technical skills of the task at hand. When you are producing, devote your whole attention to production. When mixing, devote your whole attention to getting a great mix. For mastering? Draw yourself into the consumer experience of listening to commercial music, and then come back into the technical skills of mastering to achieve the desired results.
Remember, perspective is the greatest challenge. Nobody knows your music better than you do, and no one will hear your music the way that you do. Become the consumer for a while and sneak your song somewhere into that playlist. Pay careful attention to your immediate reaction when it comes on, because tailoring to that perceived response is what you will need to address in the mastering work.
Do you have any self-mastering tips that we missed? Let us know in the comments below.
Before diving in, it is vital to familiarize yourself with these 4 essential mastering levels tips for professional results.
4 Essential Mastering Levels Tips

Setting levels for compression and limiting is a vital part of the mastering process.
How much is typical for today's music?
How loud is too loud? Get valuable tips on how to maintain proper levels for effective mastering.
By Jay Fly Mastering
So you're ready to begin mastering that great mix that you (or someone else) engineered to perfection.
This is your last chance to get things right... and no time to mess things up!
First, your goal should be to deliver a master that can compete in volume with other commercially released music in the same genre. Secondly, you want to make sure that all the elements in the mix can be clearly heard, with a proper balance of frequencies.
But perhaps most importantly, you don't want there to be even a hint of unintentional distortion. (Note the use of the word "unintentional." If you're mastering a thrash metal track, there will no doubt be plenty of it already, but on purpose.)
The key to accomplishing all three objectives is to get your levels right, and in this article we'll take a detailed look at how to do so.
1. Zero Is Zero
The first Golden Rule of digital recording is simple:
There's nothing above zero.
This applies whether we're talking about 0 dB, 0 dBVU, 0 dBFS (Full Scale), 0 LUFS, or 0 LKFS. Sure, if you try to send a signal above that point to your digital-to-analog converter, it will attempt to play the data, but since it cannot go beyond that ceiling it will instead square off ("clip") the waveform, which means distortion.
Now, whether or not you'll actually be able to hear this distortion is another question.
"It's okay to have some clipping as long as it's only on up to 10-15 consecutive samples," says mastering engineer Jay Fly, "more than that, and it's audible."
Allowing some small degree of clipping during analog-to-digital conversion (as you would do if you were digitally mastering a mix done on analog tape) can enable you to squeeze out an extra dB or so during the transfer.
"It makes the track sound louder than it would otherwise, without compromising on the sound too much," explains Jay Fly.
Other than that, clipping is generally something to be avoided like the plague.
Advanced metering plugins like the Waves WLM Plus Loudness Meter provide visual cues whenever target levels are exceeded.
WLM Plus can also issue automation warnings when overs or unders (single clipped samples) occur and can even create a real time or offline log of the audio file, flagging those instants when clipping has occurred.
You can then use your DAW to focus in on those peaks and reduce their level - something that should not affect audio quality since individual overs and unders (or even small numbers of them occurring consecutively) are generally inaudible.
Taking the time to do this can in some instances allow you to add several extra decibels of makeup gain during compression and/or final limiting.
2. Start with Sufficient Headroom
The second golden rule - actually, a corollary to the first one - is: Always leave yourself sufficient headroom.
Most plugins - especially those that model analog equipment - are designed to work at around a particular input level range, and that range definitely does not include peaks at zero.
A good rule of thumb is to keep steady signals such as rhythm guitars, synths or pads at somewhere between -20 and -16 dBFS, with transient peaks (such as occur from drums and percussive instruments) no higher than -6 dBFS.
Here's a nice tip: Jay Fly often begins by inserting a Waves Q1 (a simple single-band equalizer, included as a component of the Q10 Equalizer) as the first plugin in his mastering chain, yet leaving it completely flat.
He then uses its level control to lower both stereo channels by 6 dB in order to leave sufficient headroom for the other processes he'll be adding later in the chain.
You can actually use any plugin for this purpose, so long as it provides a stereo level control and does not color the sound.
3. Meter While You Work
Even if you've lowered the overall headroom to start with, it's a good idea to keep checking your meters as you apply different mastering processes.
If you're using a basic VU readout to measure average RMS (Root Mean Square) level, 0 on the meter should be referenced to between -7 and -9 dBFS (setting 0 = -6 dBFS or less is almost asking for trouble).
If you're checking peak levels, make sure they do not exceed -.3 dBFS.
By the way, the difference between the maximum peak level and the RMS level provides a good approximation of the amount of dynamics in the master.
If you don't want to squash the life out of the mix, try to maintain at least a 6 dB gap between the two at all times.
4. Final Targets
What should be your ultimate target level?
The answer is, to a large degree, tied to the system that will be used to deliver the music to the consumer.
If you're mastering strictly for CD, start by setting your final limiter's output ceiling to -0.2 or -0.1 dBFS (never to 0.0, or intersample peaks can sneak through and cause distortion on consumer playback devices).
If you want to err on the side of caution (or if you're mastering really loud music), try dropping it to -0.3 dBFS, which will avoid such peaks in even the worst case scenarios, and without a noticeable reduction in level.
In this in-depth video tutorial, watch Yoad set his output ceiling to -0.2 dBFS and work to get as much volume out of a track while budgeting his gain reduction, avoiding an overall sound that is too compressed:
If you know in advance that the master will be streamed (which will almost certainly mean that the delivery service will do sample rate conversion, loudness normalization, and/or encoding to a lossy format),
you may have to lower the output ceiling significantly, depending on the material, how loud you are trying to push it, and the target bit rate.
For example, if you set the ceiling to -0.5 dBFS and render a master WAV file, it may not contain any overs when converted to a 320-kbps MP3, but may have lots of them when converted to a 128-kbps MP3 (which, by the way, is as of this writing the only streaming format offered by SoundCloud).
Other delivery systems, such as Bandcamp, allow the end user to choose to download MP3 files higher than 128 kbps as well as in a variety of other formats.
Needless to say, this presents a major dilemma for the mastering engineer.
All you can really do is to shoot for a compromise, which in most cases means dropping the output ceiling by a dB more than you would otherwise.
Worse yet, pretty much every delivery service normalizes the audio files they stream - a process that can easily degrade sonic quality.
What's more, they all normalize to different levels.
Spotify, Tidal, and YouTube, for example, set a ceiling of -14 LUFS.
Apple's Soundcheck, an option in iTunes that goes through your library of music and analyzes the average volume of all the songs, can actually tell the player to turn down by as much as -16 LUFS.
And most commercial television broadcasts drop them down all the way to a whopping -23 or -24 LUFS, depending upon the country.
Mastering to one of these target levels is up to you, and arguably not necessary, but bear in mind that the music you're working with will be adjusted to one of these levels (or others) at some point after you release it, whether you like it or not.
A good compromise - and pretty much a consensus these days - is to use -16 LUFS (or -6 dBTP [True Peak] if your loudness meter offers that unit of measurement, as the WLM Plus meter does) as the target for integrated loudness.
This should serve to avoid clipping in most instances and give listeners the ability to find a nominal volume setting on consumer playback systems, all while still keeping noise reasonably low in the 16-bit CD format.
Attaining the right levels during mastering isn't simply a case of plugging in a compressor or limiter and squashing the signal until there are no dynamics left.
It's about finding the right balance between dynamics and loudness while comparing the track with others on the album or EP you are working on, as well as other tracks in a similar genre.
As with everything audio, let your ears be the final judge.
The bottom line?
Regardless of level, if something doesn't sound right, it isn't right.
We hope this guide helped you in understanding the conversation about levels and loudness during mastering.
For further mastering tips, see these 6 Tips for Limiting during Mastering and 8 Tips for Compression in Mastering.
6 Tips for Limiting during Mastering

Why is limiting needed during mastering?
What is the key to effective, tasteful limiting?
And how much is too much? Don't limit your skills by snoozing on these tips.
Limiting is the final process in mastering and arguably the most important.
Its primary purpose is to make your track as loud as possible without clipping or distortion.
While many (if not most) mixes can be improved with some carefully applied equalization or compression, it's probably safe to say that every track can benefit from limiting - though only if done properly!
In this article, we'll discuss six tips for correctly using limiters in mastering.
1. Know Your Limits
As with every other mastering process, understanding the basics is key.
Limiters are essentially compressors with extremely high compression ratios.
Although limiters and compressors both work by reducing (attenuating) transients and loud signals, the amount of gain reduction applied by a limiter is determined by an output ceiling control set by the user.
This sets the 'limit' above which the level of the audio passing through cannot be exceeded.
The big bugaboo in mastering is clipping - the squaring off of the waveform that occurs whenever a signal exceeds 0 dB, causing your playback device to output a click or a burst of harsh noise.
Obviously this is something you want to avoid!
But you also want your master to sound as loud possible, or at least in the same volume range as other commercial recordings.
The problem is, if you bring up the overall level of a track, the audio peaks are going to start clipping.
A limiter allows you to bring up the level without allowing the peaks to clip.
Modern mastering limiter plugins are extremely precise in catching peaks and won't allow anything to pass through over their set ceiling, which is why they are sometimes referred to as "peak" or "brick wall" limiters.
The good ones do this so well that you can hardly notice it happening if set correctly.
The L2 Ultramaximizer and the L3 series of limiter plugins are all designed specifically for mastering.
They are renowned for their transparency and their ability to not make the track sound obviously limited or compressed.
Limiters are generally simpler to use than compressors, making it relatively easy to dial in the right setting. They typically offer just three parameters: threshold, release, and output ceiling.
(Occasionally an attack control and other parameters will also be provided.)
Threshold determines when limiting begins, while output ceiling specifies how much limiting is applied.
When the threshold is low, even relatively low-level signals will undergo gain reduction, while a high threshold will yield a more measured response.
Regardless of threshold, lowering the output ceiling always causes more gain reduction.
The release control determines how quickly the limiter stops working after the signal drops below the threshold.
If it is overly long, you will hear audible pumping, while if it is too short, distortion artifacts may result.
Many limiters offer an auto-release option, where the optimum release time for your track is computed based on waveform activity. In many instances this will provide the best results.
2. Last in Line
If you've already applied a fair amount of compression to the stereo buss while mixing, you may not need to use it again during mastering.
Just by looking at the waveform, you should able to tell whether there are lots of peaks in the track; if not, you probably don't need to add any compression.
But as with everything audio, let your ears, not your eyes, be your judge.
Don't just use compression for the sake of it - be sure it has a purpose.
3. Limit Your Limiting
As with every other mastering process, when it comes to limiting, less is more.
Pushing a limiter too hard usually leads to disappointing results and may even ruin your track altogether.
It's easy to see why:
The more limiting you apply, the more the peaks - typically drums and percussion - get squashed down into the mix.
True, this allows you to turn up the overall level, but at the cost of a loss of attack and punchiness.
Remember also that limiters are much more aggressive than compressors and are therefore capable of doing more damage to your mix.
The goal should be to apply light limiting that complements the music and allows you to eke out a little more gain, but without sucking out the energy and excitement of the track.
Start by setting the output ceiling to -0.2 or -0.1 dBFS (never to 0.0, or intersample peaks will sneak through and cause distortion on consumer playback devices) and a very low threshold of around -0.5 or so.
This should result in gain reduction of about 2 to 4 dB, which is really as high as you want to go in most instances.
Any more than that and you'll likely end up with sonic artifacts which aren't worth the extra level you're gaining.
When set correctly, your limiter should kick in only when things get out of hand yet ensure that no clipping occurs.
In this tutorial you'll see an example of the L2 Ultramaximizer being used to master your music for online streaming: (The L2 comes into play at 11:26)
4. Maybe Multiband, Maybe Multiple
Just as there are multiband compressors, modern mastering tools also include multiband limiters such as the L3 Multimaximizer and the L3-16 Multimaximizer.
These offer multiple frequency bands (five in the case of the L3 Multimaximizer, a whopping 16 in the case of the L3-16) but do not consist of independent limiters operating separately; instead, they have one central peak limiter which examines the signals of all of the input bands and then calculates optimal attenuation for each, applying automatic gain reduction so that the mixed result is custom-limited to fit the music.
"You set the threshold, which determines how much the overall gain is increased," explains mastering engineer Yoad Nevo.
"The L3 then tries to make the least audible change to each band in order to provide the required gain change.
It will automatically limit the most in the bands where the most energy is.
This generally should be no more than 2 dB or so, but you can override this by telling it to do more limiting in an adjacent band - for example, you can limit the low end more in order to preserve more of the dynamics in the low-mid band, where the bass and some of the guitars are.
The correct use of the L3 adds a great deal more loudness to the track without fundamentally altering the dynamics or balance."
Some mastering engineers even use multiple limiters.
Jay Fly sometimes starts out with an L2 to boost the level slightly before routing the signal to an L3.
"Because the L2 is wideband," he says, "it applies limiting to the whole frequency range.
But the L3 allows me to control the different frequencies in a less dynamic way.
Because of the L2, the kick, the snare, and the vocal are all tighter together, so in the L3 I can structure the low frequencies and the midrange a little more finely so that it mainly just limits the kick drum."
On occasion, Jay Fly has even been known to add a third limiter to the end of the chain - another L2 - to squeeze another dB or two out of a track.
In this in-depth mastering webinar with Jay Fly, you can see his L2 and L3 chain in action as part of his entire mastering process:
5. Disengage from the Loudness Wars
By now, you've probably heard of the so-called loudness wars - the seemingly never-ending battle to master as loud as possible with little regard for the consequences.
Our advice: Disengage.
The fact of the matter is that louder is not always better.
Yes, the typical response to an increase in loudness is usually positive - we tend to turn the music up when a favorite song comes on - but over time, relentlessly loud music can cause listening fatigue to the point of becoming unbearable.
When you start applying limiting, you may feel at first that you have improved things by increasing the apparent loudness, but make sure that you haven't sucked all the life out of the track in doing so.
Which segues perfectly to our final tip...
6. Reference Religiously
"Referencing" is a fancy term that just means: keep comparing.
Compare your master to the original mix (at equal loudness!) in order to ascertain what you've gained (or lost) by using a limiter to reduce peaks and make things louder.
Then, once you've satisfied yourself that the benefits have outweighed the liabilities, listen to your master on a variety of playback systems to make sure that it translates as universally as possible.
Finally, compare it to commercially released recordings of music in a similar genre.
(If the music you're mastering is mellow, there's no point in comparing it to thrash metal!)
If you're mastering multiple tracks for the same CD or compilation, this becomes even more critical.
"Listen to all the tracks back-to-back, focusing mainly on the vocal," suggests Jay Fly.
"Be sure to check all tracks on different speakers and at different monitoring levels.
If you hear level disparities between the tracks, nudge the levels on your limiter plugin until they are as even as possible."
10 Tips for Effective EQ during Mastering

In this article, we'll look at the top ten tips for applying equalization during mastering - the final stage music passes through before being released to the world.
Mastering is the final stage any piece of music passes through before being released via streaming or physical media - the last chance to add professional polish to a recording and make it appealing to the listening public.
In practice, effective mastering is all about skill, experience, and having the right tools at hand.
Equalization is one of the primary weapons in the mastering arsenal, where it is used to add warmth, "air," and tonal balance.
EQ can also be used to correct problems like overly loud frequencies that pop out and overwhelm the rest of the mix.
Let's look at top ten tips for applying equalization during mastering:
1. Use an Accurate Monitoring System in an Acoustically Tuned Room
Trying to master while listening through inaccurate speakers in a room that is not acoustically treated is like attempting to paint a picture while wearing dark sunglasses covered with grime and smudges.
If your speakers are bass-light, you will naturally tend to boost low frequencies, which will make the final product boomy when listening on other systems.
Conversely, if your listening space has prominent room "nodes" (that is, resonant low-end frequencies that often occur in untreated rooms), you will roll off bass to compensate, which will make your master notably thin and lacking in punch.
Always invest in the most sonically neutral speakers you can afford and be sure to install at least some basic acoustic treatments (such as bass traps, diffusors, etc.) in your room.
2. Understand the Basics
You'll find pretty much the same controls in every EQ plugin:
- A number of bands will be provided, each of which can be set to a different frequency. Within each band, you can adjust the gain in order to boost or cut the selected frequency area.
- The highest and lowest bands can also usually be used for shelving; that is, they can roll off frequencies above or below, in which case they act as a low-pass or high-pass filter, respectively. Shelving bands will offer a slope control, allowing you to adjust the gradient (gentle or steep) at which the gain rolls off.
- In addition, most EQ plugins are parametric, meaning that they also provide a width, or "Q" control to narrow or widen the frequency area being affected.
3. Use EQ in Its Proper Place
Most mastering sessions require the use of not just one, but a chain of plugins (and/or, in some cases, analog signal processors).
While there are no hard and fast rules, if you're mastering "in the box" (that is, inside your DAW), an EQ plugin generally is used early in the chain, before or after any compressors.
Limiter plugins like the Waves L2 or L3 are basically employed to add overall loudness and so are almost always at the end of the chain.)
However, because every process interacts with every other one (and because each tends to color the signal somewhat),
It's a good idea to have all the plugins you plan to use inserted and active while tweaking the EQ.
That way, you can hear the results in context.
4. Cut, Don't Boost
A reduction in the energy of a frequency band - that is, subtractive equalization - is generally more pleasing to the ear than a boost.
In fact, if your goal is to increase one particular frequency area, it can often be more effective to instead cut (attenuate) the frequencies around, under, or above that band.
If you turn down the lows, it will sound as if you've turned up the mids and highs; conversely, if you reduce just the highs, the mix can appear to have more low end.
5. Less Is More
Mastering is all about subtlety.
Professional mastering engineers rarely cut or boost any frequency area by more than 1.5 dB. They understand that even a slight change can have a big impact on the resulting audio.
You should follow the same principle. Work in increments of half a dB or less (0.25 dB is ideal) and listen carefully to how your tweaks - which in some cases can be felt more than heard - affect the overall sound.
Mixing and mastering engineer JayFly (Sia, Pet Shop Boys) says flatly,
"If you have to EQ more than 2 or 3 dB, then you're probably doing something wrong."
Or it may be an indication that there's a problem with the mix;
if so, you should remix with the frequency problem areas in mind.
6. Correct the Tonal Balance
The first step in every mastering session is to listen.
Close your eyes and just listen.
Begin by focusing on the overall frequency spectrum.
Is there a relative balance between lows (i.e., bass and kick drum), mids (vocals, guitars, keyboards), and highs (high-hat, cymbals, percussion)?
Is the mix thick and muddy, or is it thin and anemic?
Is it boomy, or toppy?
Is there good definition between instruments - that is, can you clearly discern between guitars, keyboards, and the vocal?
These are all problems that can be addressed in mastering.
If the mix sounds muddy, boxy, or lacks definition:
Most of the elements in a mix - including delays and reverbs - wander into the midrange areas.
(Even the kick drum can go right up into the high mids.)
Muddiness is generally caused by an excess of energy that area, so to combat it, try attenuating the low-mids in the 150-350 Hz range.
This is a trick that opens up space because it allows more of the high-mids to get through.
That's the beauty of subtractive EQ: cutting one frequency area allows an adjacent area to be better heard.
If it sounds thin:
This occurs when a mix is lacking in midrange frequencies, as compared to the highs and lows
The solution is a gentle boost in the 500 Hz area.
Don't go too far, though, or everything will start sounding boxy and artificial.
Other ways of combatting thinness are to use a classic analog EQ (or a plugin modeled on one; see Tip #9 below), a tape emulator such as Kramer Master Tape, or a bass enhancement plugin like MaxxBass.
If it sounds boomy:
Roll off some 100-150 Hz.
If it sounds toppy:
Try an EQ cut around 3-8 kHz.
Another approach is to boost the low end slightly, which has the psychoacoustic effect of blunting the high end somewhat, even though the high frequencies haven't actually been reduced.
If it sounds dull:
A slight top end shelf boost (in the 10-15 kHz area or higher) can help open up a track and make it sound "airy."
The danger here is that you might also be raising the level of the cymbals and hi-hat too much in proportion to the rest of the drum kit.
Another way of combatting dullness is to use a harmonic "enhancer" plugin like the Aphex Vintage Aural Exciter or Vitamin Sonic Enhancer.
In this video, audio engineer Jay Fly (Beyoncé, Sia) demontrates mixing and mastering with Vitamin - jump to 07:15 for his mastering tips:
If the mix is lacking "presence":
If the lead vocal or guitar solo doesn't pop out, try boosting a little bit in the 3-5 kHz area.
Bear in mind that this can also have the adverse effect of making those elements disproportional to the rest of the mix.
Of course, attenuating the same frequency area allows you to do the reverse.
Legendary mastering engineer Bob Ludwig recalls one session where he was instructed to pull the lead vocal back by half a dB.
"I used the Waves Linear Phase EQ to do that," he explains, "so it did not alter the sound of the rest of the mix."
While all of the EQ changes described above can be made with pretty much any equalizer plugin, you might consider the use of a linear phase plugin such as the one described by Jay Fly.
These utilize advanced technology that enables the signal to pass through all bands at the same speed, resulting in greater transparency and zero phase issues, as opposed to traditional equalizers which cause some "smearing" of the sound due to minute delays in the bands being cut or boosted.
7. Identify and Fix Any Problem Frequencies
If there are "problem" frequencies that stick out, like resonance in the acoustic guitar or certain bass notes (caused by improper recording or a poorly set-up instrument), use the following procedure to identify them:
(a) Choose the approximate frequency band in your equalizer plugin and set a narrow width ("Q").
(b) Boost that band by 5-10 dB. (Don't worry-this is only temporary!)
(c) Use the frequency control to sweep up and down as you listen closely.
(d) When you hear the problem frequency become noticeably louder, narrow the Q some more and continue sweeping until the sound is at its loudest.
Once you've identified the offending frequency or frequencies, try applying a small notch-like reduction.
Make this cut in small increments (half a dB at a time or less) until the resonance is sufficiently reduced but without affecting the overall musical content.
This is particularly important, since you never want to make any EQ changes that will negatively impact on the mix.
The goal here is to help, not hinder!
If problem frequencies only occur in certain isolated sections of the song, you might consider suppressing them with the use of a dynamic EQ like the F6.
These kinds of plugins apply controlled amounts of compression to reduce specific frequency areas, kicking in only when the level exceeds a user-specified threshold and thus giving you full control over when and to what degree those frequencies will be attenuated.
8. Remove Rumble
One step that many mastering engineers take as a matter of course is to set the lowest (shelving) band of their equalizer to act as a high-pass filter by rolling off frequencies below 30-40 Hz, with a gentle slope of 6 dB or less to avoid phasing problems.
This can act as a preventative measure if there is a lot of rumble or subsonic activity in the mix (something which the mixing engineer might not have been able to detect if there was no subwoofer in use) and can also tighten up the remaining bass - plus it may give you a little extra headroom to work with, which is never a bad thing.
However, this should be done with caution (and possibly shouldn't be done at all in bass-heavy genres such as EDM) since you can sometimes lose the impact of the kick drum this way.
9. Two EQs Can Be Better Than One
As described in Tip #6 above, traditional (that is, non-linear) equalizers can cause a phase anomaly known as "smearing," especially when multiple bands are being cut or boosted.
However, in many cases you may actually want that sound; after all, the vintage analog EQs that people revere today smeared the phase too.
Sometimes a little analog-like warmth can do wonders to add color to your mix.
For that reason, you may want to add a second EQ plugin to your chain, devoted mainly to adding "character" to the mix.
"The PuigTec EQP-1A, much like the hardware it emulates, has the uncanny ability to impart warmth and and presence just by the act of turning it on and passing audio through it," says Red Hot Chili Peppers mastering engineer Jay Fly.
(You can download Jay Fly Mastering customized mastering presets for the PuigTec EQs here.)
Other Waves plugins that provide analog EQ emulation include the H-EQ and the V-Series EQs.
If you don't want to go that route, you can often get good results by using both linear phase and standard equalizers together -
for example, you might use a standard EQ plugin to color the low end and low-mids, and then follow it with a more surgically precise linear phase plugin to tweak the mid, upper midrange and high end.
10. Harness the Power of MS Equalization
If you're looking to bring out specific elements of a mix, try using an EQ plugin that offers mid/side (MS) processing, like the F6 or H-EQ.
These powerful tools allow you to separate out those parts panned dead center (i.e., the lead vocal, kick drum, snare drum, and perhaps one or two other components) from those panned off to the sides (i.e., everything else).
For example, by simply boosting a relatively small area of midrange frequencies in the center channel, you can effectively raise the level of vocals.
In this video, mixing and mastering engineer (Jay Fly Mastering) shows how to use MS mode to control the level of the kick drum (jump to 18:12 to watch this tip):
"By boosting the low-mid band [in the center channel]," Jay Fly explains,
"I can increase the energy around the fundamental of the kick, and by cutting the mids at around 2.5 kHz,
I can reduce some of the click of the beater.
Then I can go to the sides channel and add some high mid at around the same band, which will allow me to lift the synth pads and make the overall signal a bit wider and more majestic but will not affect the kick at all, even though it's around the same frequency."
Here are a few more things you can do using side-channel equalization:
- Widen the stereo image: Add a touch of high shelving at 8 kHz or higher.
- Reduce muddiness and tighten up the overall sound: Add some low shelving at 200 Hz or lower.
- Tighten up just the low end: Reduce frequencies below 75 Hz.
- Add more definition to vocals: Make a slight cut in the 500-1000 Hz range.
- Give the mix an increased sense of space: Boost the frequencies below 600-650 Hz with a low shelf.
Hopefully these tips will give you a greater sense of the power of equalization in mastering.
Now go out and craft some great tracks!
8 Tips for Compression in Mastering

Why compress during mastering?
Is every compressor a mastering compressor?
When is it best to cascade your compressors? Get tips on these questions and more.
Like equalization and limiting, compression is an important part of mastering.
It's a great way to add punch to your mix as well as a sense of overall control.
Used correctly, compression can make your recordings sound richer and more energetic, plus it can help ensure that the various sections of your song flow well into one another.
Perhaps most importantly, compression can act as the "glue" that ties all the sonic elements together into a cohesive whole.
But, like every other process, it has its potential downfalls too. In this article, we'll look at several important tips for using compression during mastering.
1. Know the Basics
Compression works by lowering the level of the loudest parts in your mix - the peaks you see sticking out when you view the waveform.
By making them softer (a process called gain reduction), it reduces the overall dynamic range - that is, the difference between the loudest and quietest sections of a song.
You'll find pretty much the same set of controls in every compressor plugin.
Threshold and Ratio:
Threshold determines when compression begins, while ratio specifies how much gain reduction is applied.
These two controls are highly interactive.
A low threshold with a high ratio will cause lots of compression and result in a sound that is quite squashed and lifeless, whereas a high threshold and low ratio will yield the kind of transparency you want during mastering.
Attack and Release:
Attack determines how quickly the compressor begins working once a signal exceeds the threshold setting, while release determines how quickly it stops working after the signal drops below the threshold.
These two controls are so important that we're going to devote an entire tip to them - see #5 below.
Soft vs. Hard Knee:
A knee setting specifies the smoothness of the transition from no compression to full compression once the threshold is passed.
A "hard" knee means that the compressor clamps down on the signal almost immediately, while a "soft" knee means the compression kicks in more gradually as the signal goes further past the threshold.
Because "softer" knee settings are less aggressive, they are used far more often in mastering situations.
Make-Up Gain:
This parameter allows you to boost the compressed signal, enabling you to bring your track back to its starting level, although it now 'lives' within a compressed, or reduced, dynamic range.
The end result is that everything sounds not only louder and punchier but more even overall.
2. Compression in Mastering Is Optional, Not Essential
If you've already applied a fair amount of compression to the stereo buss while mixing, you may not need to use it again during mastering.
Just by looking at the waveform, you should able to tell whether there are lots of peaks in the track; if not, you probably don't need to add any compression.
But as with everything audio, let your ears, not your eyes, be your judge.
Don't just use compression for the sake of it - be sure it has a purpose.
3. Not Every Compressor Is a Mastering Compressor
Not all compression plugins are able to handle the large amount of sonic information contained within a mix.
Those designed for a single instrument or group of instruments may struggle when used for mastering purposes - they may color the sound in undesirable ways or even produce distortion when driven hard.
Compressors designed to cope with mixes are often called buss compressors since they are usually inserted across a stereo buss, as opposed to a single channel.
Two examples are the SSL G-Master Buss Compressor and the API 2500 Compressor.
These types of plugins are usually the best choice for mastering, although there are times when you may want to insert a secondary compressor for multiband compression or for "color" (see tips #6 and #7 below).
In this short video, mixing and mastering engineer Jay Fly (Sia, Pet Shop Boys) shows how he uses the SSL G-Master at the very start of the mastering process to "glue" a song together:
4. Less Is More
As with equalization, the less compression you apply during mastering, the better the result.
In fact, the quickest way to make your master sound like a demo is to overcompress it.
Most mastering engineers use high thresholds and low ratios (typically 1.25:1 or 1.5:1 - rarely anything more than 2:1) in order to achieve just 1 or 2 dB of gain reduction.
The idea is to feel rather than hear any compression being applied.
Engineer Jay Fly says, "I hardly use compression in mastering, and if I do, it's more in terms of coloring the picture rather than trying to change the internal dynamics."
While the application of compression during mastering can help enhance a mix in some circumstances, it's also important to remember that a recording with a relatively broad dynamic range feels musical and exciting, whereas one with minimal dynamics feels tight and fatiguing.
How much dynamic range you opt to preserve is largely a judgement call based on your taste and the genre of the music.
5. It's All in the Attack and Release
As we said, the attack and release controls are especially important.
An attack time that is too short can be damaging to the music, since it will cause the compressor to grab and squash the transients - those short bursts of almost instantaneous sound (such as the beater of the kick drum or the attack of a bass note) that contain all the punch.
On the other hand, if the attack time is too long, too much audio will have passed through before the compressor has time to react.
Accordingly, start with an attack time in the 30-40 ms range (an ms, short for millisecond, is a thousandth of a second) and be prepared to dial it up as far as 100 ms.
When you've got it just right - and bear in mind that you may not be able to ascertain the optimum attack time until you set the release time correctly - the percussive elements of the mix will pass through unscathed, despite the compressor reining in the overall level.
The release time is a little trickier since the goal is to get the action of the compressor to blend in with the musicality of the track.
Too short of a release time will result in audible pumping; too long and the compressor will rarely if ever return to its zero state, resulting in nearly constant gain reduction.
The sweet spot occurs when the release time complements the attack time.
In mastering applications, you'll generally want to set the release time so that it is slightly longer than a beat.
Simply divide 60,000 - the number of milliseconds in a minute - by your track's beat-per-minute (BPM) tempo to get the number of milliseconds in each beat.
This way, the compressor is still working somewhat - though at a reduced intensity - when the next transient (usually the kick or snare) comes along and exceeds the threshold.
The result is smooth gain reduction which follows the music, as opposed to it kicking in and out randomly.
Depending upon the tempo, typical mastering compressor release times might range from 300 to 800 ms or more.
As you can see, there are no attack and release values that are ideal for every track.
When you get them right, your compressor works almost invisibly, but when those settings are too fast or too slow for the music, compression becomes obvious and intrusive.
6. Understand Multiband Compression
While a standard mastering compressor processes the entire track as one sound, a multiband compressor breaks up the frequency spectrum into several bands and allows you to compress or expand each differently.
(Expansion is the opposite of compression; by lowering the level of soft signals, it increases rather than decreases dynamic range.)
Because it is more inconspicuous and subtle than traditional compression, multiband compression can be a powerful mastering tool, used for everything from taming overly loud cymbal crashes to tightening up the low end without affecting the rest of the track.
Plugins such as the Linear Phase Multiband Compressor (which offers five user-definable frequency bands and advanced mastering features such as adaptive thresholds, automatic makeup gain, and finite response filters) let you focus on specific instruments or areas of a mix and boost or attenuate them with a great degree of accuracy.
As with every other kind of mastering process, multiband compression can yield tremendous results when done properly, but it can also negatively impact your mix if overdone or applied incorrectly.
For example, be sure to set the same (or at least similar) ratio in all the bands being affected or you run the risk of adding an imbalance to the sound.
7. Cascade Your Compressors
Sometimes even the best mastering compressor can't do the job alone.
Adding a second compression plugin can be much more effective than simply increasing the intensity of the first one.
To get more gain transparently:
If you're looking to keep your compression transparent yet still achieve lots of gain, it's often better to use two similar compressors in series (i.e., one after the other), thus cutting in half the workload on each.
For example, the first compressor could be used to begin delicately taming some transients - maybe a dB or so of gain reduction every now and then - by setting it to a very low ratio (1.2:1 or 1.25:1) with a relatively slow attack.
The second compressor can then be set to a marginally higher ratio and slightly faster attack in order to go after any remaining peaks a little more aggressively.
To deal with specific problem areas, try using a multiband plugin like the Linear Phase Multiband Compressor as the second compressor; see tip #6 above for more information.
To add color to the mix:
To add color and character to your mix, consider adding as your second compressor a plugin modeled on a tube or transistor-based hardware device.
These impart what some call a "fatness" or "warmth" - in reality, an emulation of a signal that is saturated, modulated or slightly out of phase.
Analog circuitry also tends to add random anomalies that lead us to believe that we are hearing an improvement over the original signal.
A good example of this kind of plugin is the CLA-2A Compressor/Limiter - a particular favorite of Jay Fly, who says "even though it's not really a mastering compressor, it can sound cool because its processing is kind of slow due to the nature of the optical circuitry of the original unit it's modeling.
Using it gives you the best of two different worlds, because the main master buss compressor makes everything punchy and brings the sound closer, whereas the CLA-2A adds some coloring and does something nice to the stereo image, making it slightly wider."
In this webinar, Jay Fly shows how to use both CLA-2A and the SSL G-Master plugins when mastering a song:
Another Waves compressor plugin that falls into this category is the PuigChild Compressor, modeled after the legendary analog device used extensively on Beatles recordings.
Mastering engineer Jay Fly (Red Hot Chili Peppers) has developed a Vintage Mastering Glue preset for the PuigChild, which he describes this way in this interview:
"Cymbals will decay into the heavens while the bass will occupy its own big round universe.
Crank on the threshold for even more of a time warp."
8. Compare Constantly
When it comes to compression, the Bypass button can be your best friend.
Every time you tweak a parameter, click on the button to ensure that you're actually making the mix sound better.
Keep flipping back and forth so you can hear the processed signal versus the original.
If your plugin has a "Compare" or "A/B" function that toggles between two sets of parameters (as is provided by most Waves plugins), use it frequently to test different settings in quick succession.
This video shows how to use the A/B function in Waves plugins:
There is one important caveat, however, and that is to make sure that the two signals you're comparing are the same in level.
(To do so, simply use the Make-Up Gain control.)
In every instance, the compressed signal should sound better - if it does not, you're doing something wrong, so go back and start over!
The biggest mistake you can make is thinking that your mastered version sounds better than the original mix just because it's louder.
Hopefully these tips have given you a better understanding of how to apply compression during mastering.
For more mastering tips, check out this article